A few years back, I did a post on Photographing Artwork that covers the basics of what I learned at the Illustration Master Class about photographing paintings (make sure to read the comment by Blue Jai—he gives some great advice!). Additionally, Dan Dos Santos did a great post on this topic over on the Muddy Colors blog called How to Photograph Your Paintings.
Still, one of the number one questions I get from other artists is, “How do you photograph your paintings?” It seems like a big mystery, but it’s really not. Like anything, the unfamiliar seems a little scary sometimes. My first piece of advice is try it on your own. The best way to learn how to do something is to do it. So get in there Champ!
Alright pep talk aside, I do not have the fancy set up and equipment that Dos Santos has. One day I plan to get those things because they make it nicer, but in the mean-time I’ve got work to do. So my first piece of advice is don’t get too caught up in expensive tech gear. Use the camera you have and the other tools available to you. As you continue to work you can add other things and make the process easier and better (and when you do get that stuff you’ll really appreciate why it’s so much better!).
There are, however, a few MUST HAVE items:
1. A Camera, preferably one with a timer so you don’t touch the camera when photographing and one that can be set to tungsten light.
2. 500 Watt ECT Bulb – Tungsten Light. You’ll need 2 of these. (LINK to where I bought mine)
3. Two Clamp Lights (LINK to Home Depot)
Assuming you already have a Camera you can get the lights and the clamps for about $40 total. If you don’t have a decent Camera you’ll need to invest in one. You need it for shooting good reference as well as photographing your paintings.
Alright onto my fancy setup:
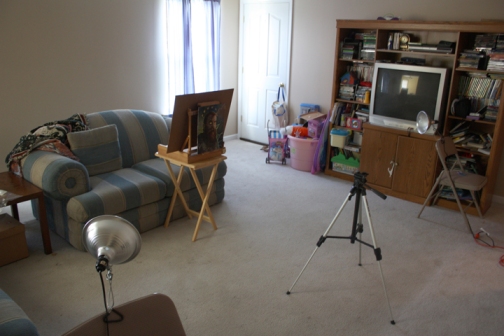
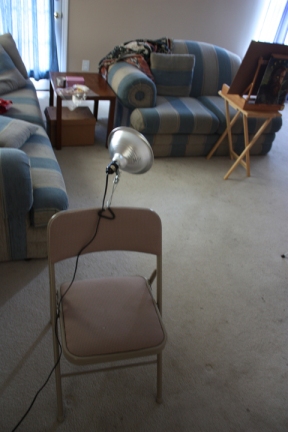
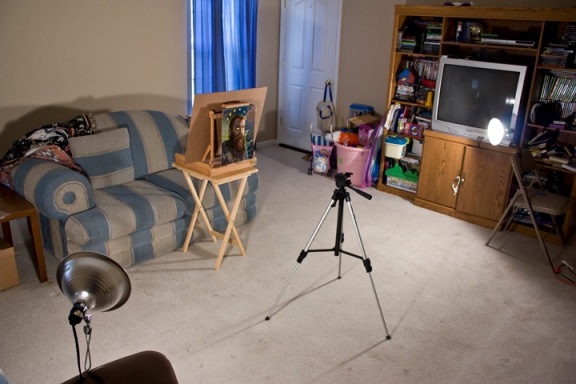
I place my painting on an easel on top of a little table. I make sure the painting is a straight up-and-down as possible. I place my camera stand in front of the panting and make sure the camera is parallel to the painting. I set up 2 chairs and clamp my lights to the backs of the chairs. I stand behind my painting to make sure the lights are an equal distance away from the painting and then use a protractor to make sure the lights are hitting the painting at about a 30 degree angle.
I then turn on the lights. LOOK AWAY—these bad boys are super bright. I then photograph the painting. I set the ISO to 100 (this makes the painting less grainy in the shadows). I set the white balance to tungsten. I set the file type to Camera RAW (this makes it MUCH easier to adjust in Photoshop). I set the aperture to F14.
I then look through the lens, focus on the most important part of the painting, and adjust the shutter speed to about -1. I like to shoot the painting underexposed, then optimum exposed, and then over exposed. I figure you’ve already set this whole thing up—might as well shoot at the different settings because you don’t know which one will look the best. I often find that under exposed paintings match the color more closely in Photoshop with minimal digital adjustment.
Then you photograph the painting in pieces and combine in photoshop. Dan has already provided great advice in his post so read all about it on Muddy Colors.
And that’s about it. I hope this helps de-mistify the process I use for those curious folks out in the mega verse.
Stay Strange!
Sam Flegal
www.samflegal.com


No comments:
Post a Comment